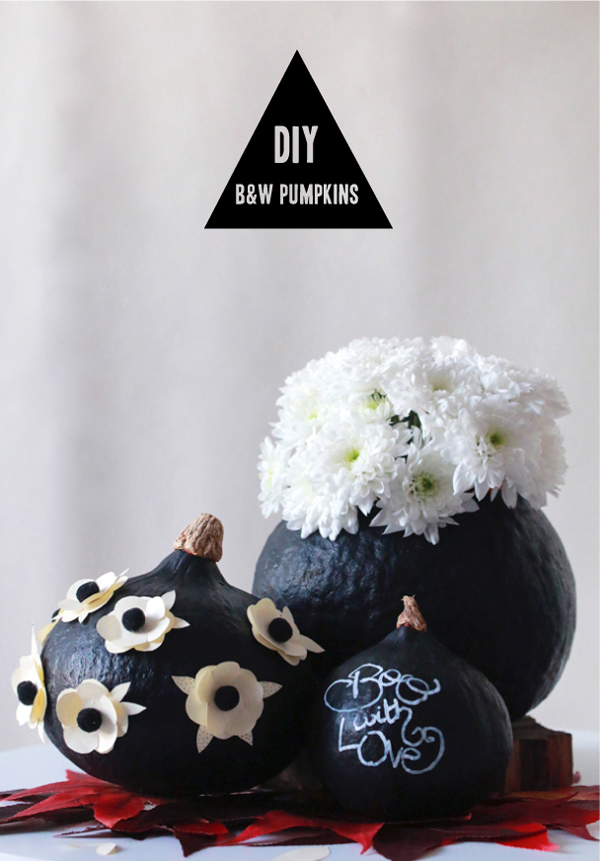
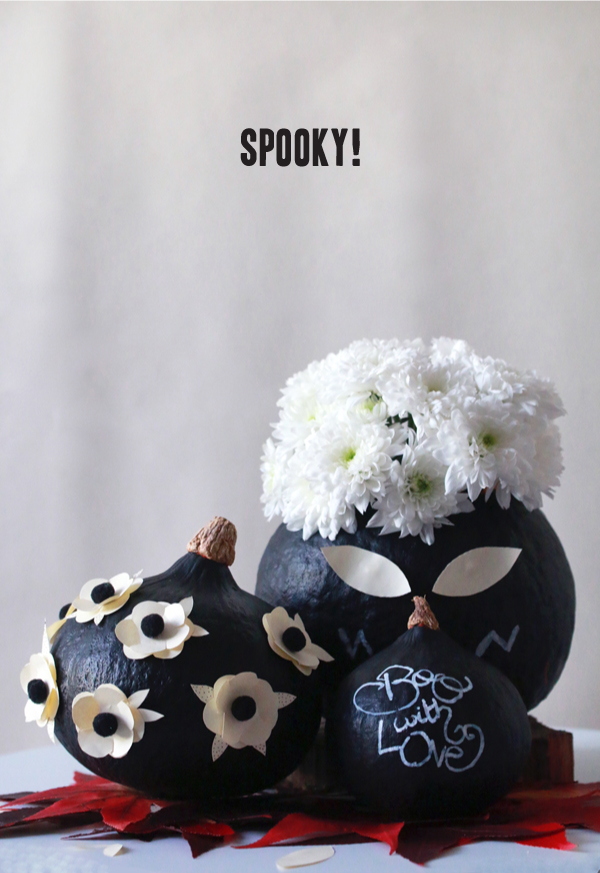
DIY- B&W Halloween Pumpkins
Just in time to put your Halloween decor together, here’s our new not-so-spooky DIY in collaboration with Astrid of the SP4NK blog! I really love this black pumpkin alternative. Are you throwing a stylish Halloween party? This easy DIY is for you!

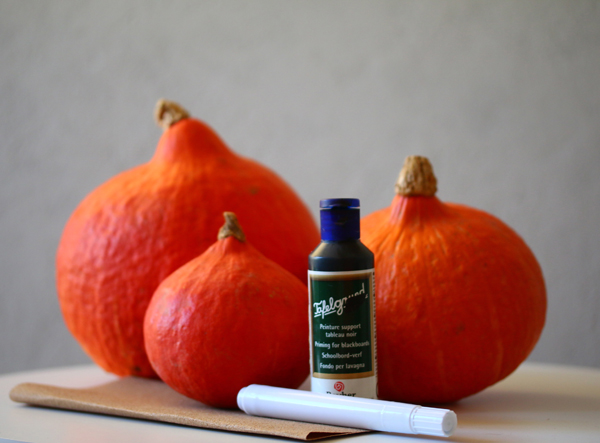
What you’ll need:
–Pumpkins or mini pumpkins
-Black chalkboard paint
-Masking tape
-A brush
-A knife
-A vase
-White paper
-Black pompoms
-A white marker, or white paint
-Paper glue
-Textile glue
-Scissors
Step 1 : Paint Your Pumkins
Firstly, you will need to hide your pumpkin stems with masking tape in order to keep them unpainted. Then you can use your black chalkboard paint to paint all your pumpkins.
Trick: To paint the underside of the pumpkins, we suggest you wait for the pumpkins to dry and then turn them upside down in a vase to paint the underside. Let them dry.
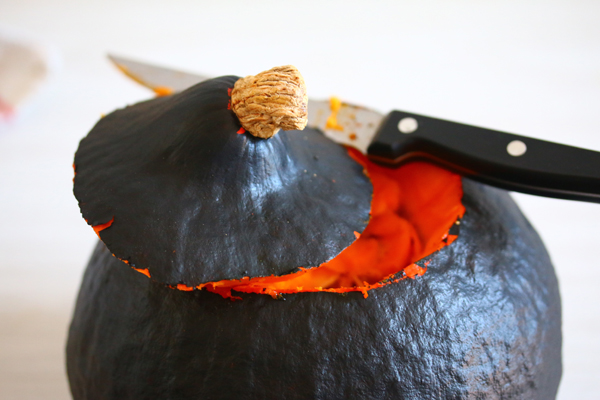
Step 2: Turn your pumpkins into a vase
To transform your pumpkin into a vase, you’ll need to carve it and empty it out. You can insert any vase you have inside the pumpkin as long as it doesn’t peak out of the pumpkin. Pour some water in your vase and add some white flowers, and that’s it! You’ve got a black & white pumpkin vase!

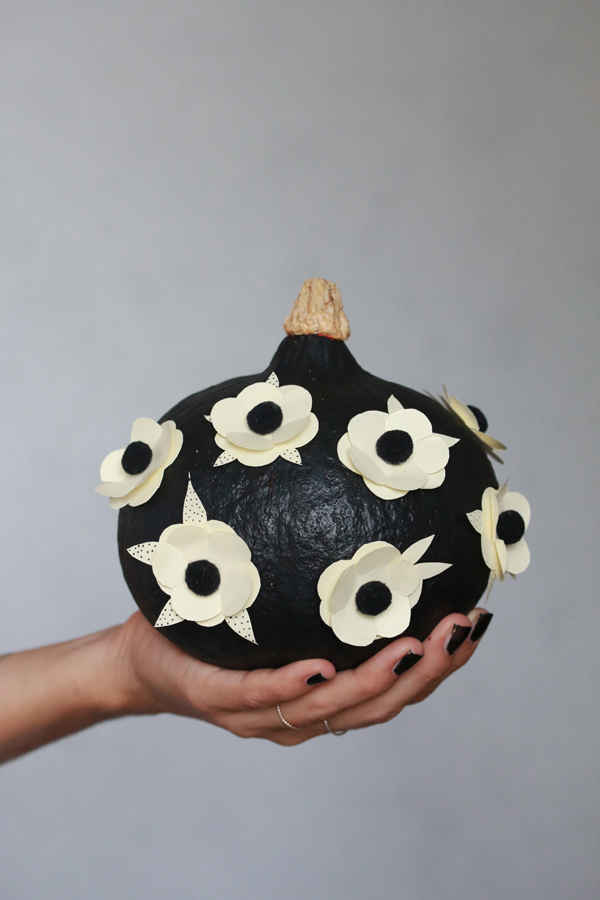
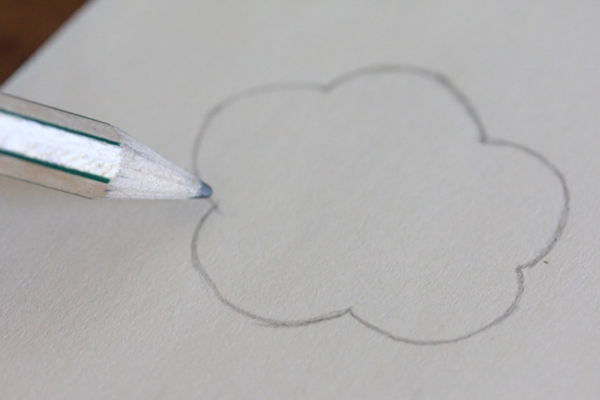
Step 3: Make a floral pumpkin
Use some basic white paper (or whatever paper you’d like) and fold it in 6 equal parts. Draw one flower and cut it out. It’s better if you fold the paper in 6 because you’ll get 8 flowers by cutting only once. Repeat to get as many flowers as you need to decorate your pumpkin. You can proceed the same way to cut out some leaves.
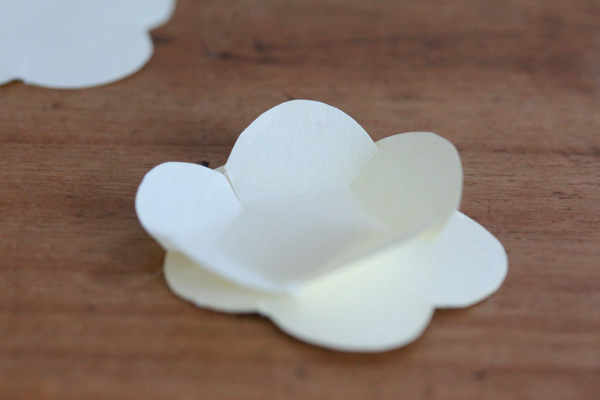
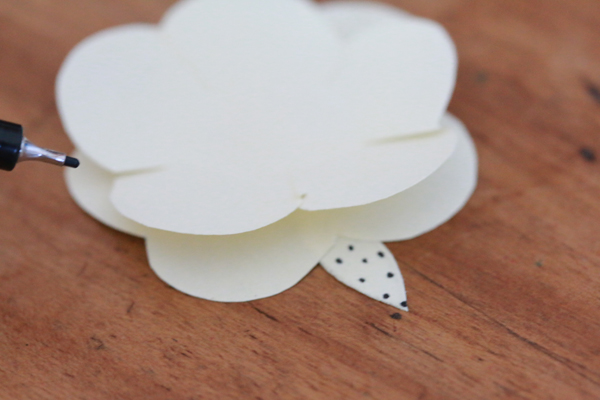
Use 2 flower cuttings and 2 leaves to make one flower. Use your paper glue to glue them together. Make your flower pop out as in the picture. Glue the flower and the leaves on the pumpkin using either sticky tack or hot glue. To stick the black pompom in the middle of your flower, use your textile glue.

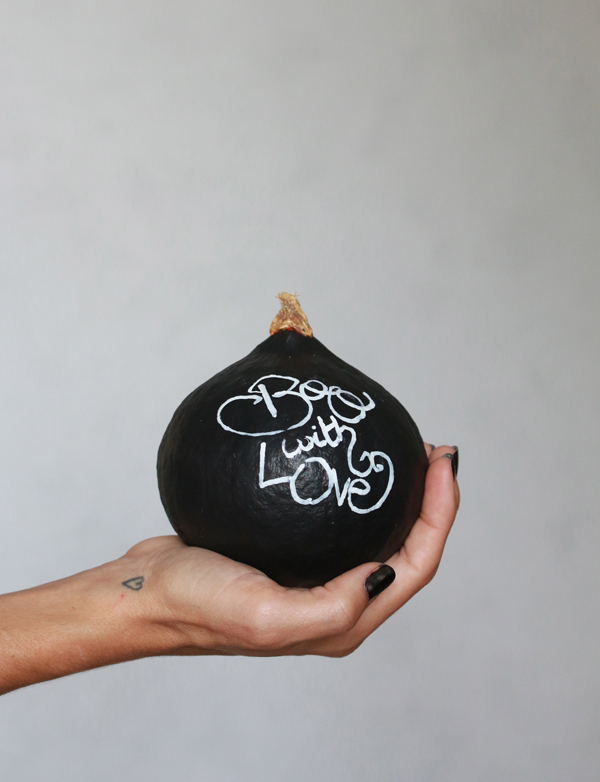
Step 4: Write a message on your pumpkin
This one is the easiest! Use your white marker, or white paint to write whatever message you want on your black pumpkin. It’s much easier with a white marker. You need to make sure the black paint has really dried before you try to write on your pumpkin, otherwise the black paint will smudge.
Tadam! Put your 3 different pumpkins together and create a cool tabletop decor. Happy Halloween guys!
Pssst ! If ever you make this DIY project we want to see the results! Tag us using our instagram handle @babasouk. We’d love to see your creations !
*Pictures and DIY by Astrid of the SP4NK blog