DIY Upcycled XMAS Garland
We have such a fun DIY project for you guys! Make a lovely Holiday garland using odds and ends you find around your house. You’ll be amazed at how cute it turns out! You’ll have fun finding the perfect little objects for your garland. Invite some friends over and rev up your craft skills ! Thanks to Astrid of the SP4nK blog for this adorable collab!
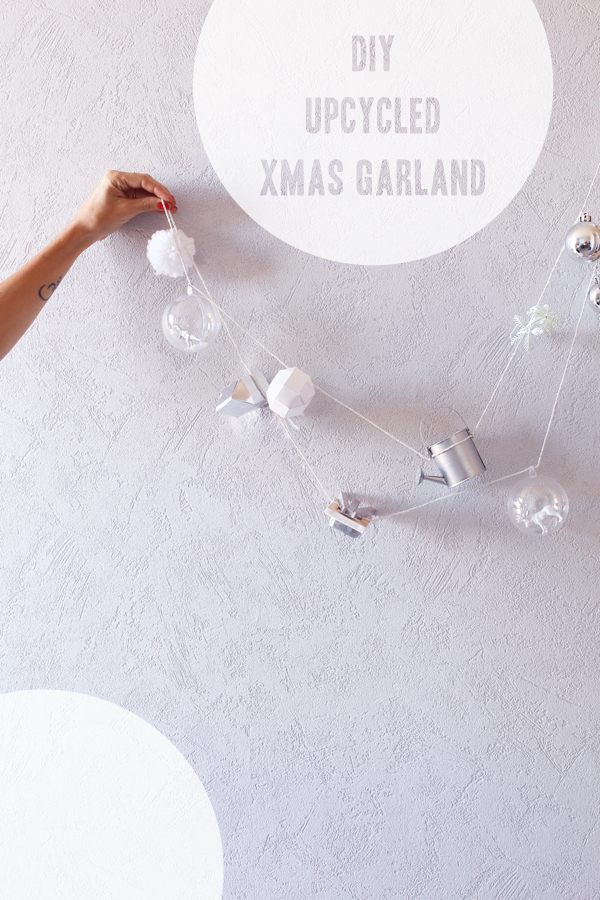
Use all sorts of little treasures that cost nothing!
We opted for a white & silver color scheme, I love how it turned out!
Tadam! It’s super easy to make and the possibilities are endless…
Click below for the step by step instructions and learn how to make your own!
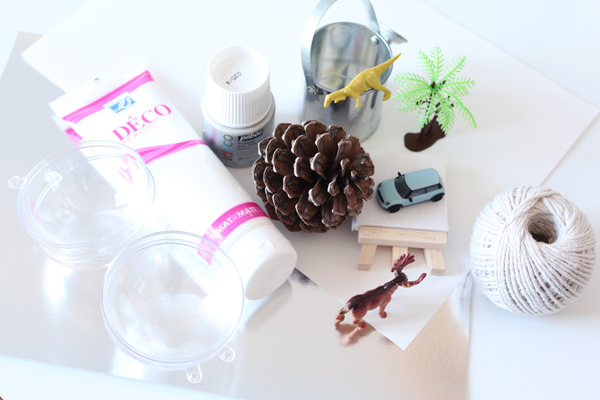
What you need:
– Thick kitchen twine
– White acrylic paint
– Silver acrylic paint
– Transparent Xmas baubles (or any other you may find!)
– Silver glitter
– Sheet of white cardboard
– Sheet of silver cardboard
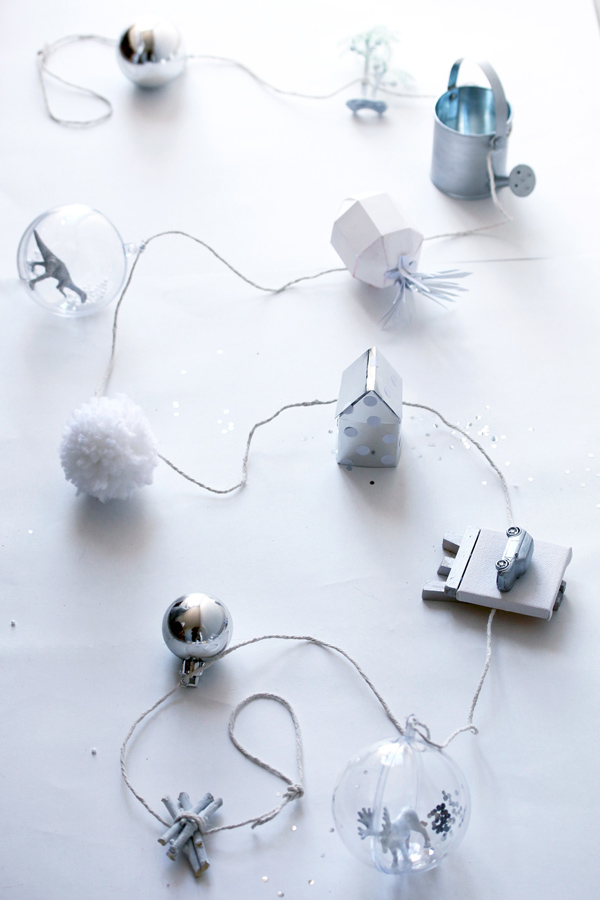
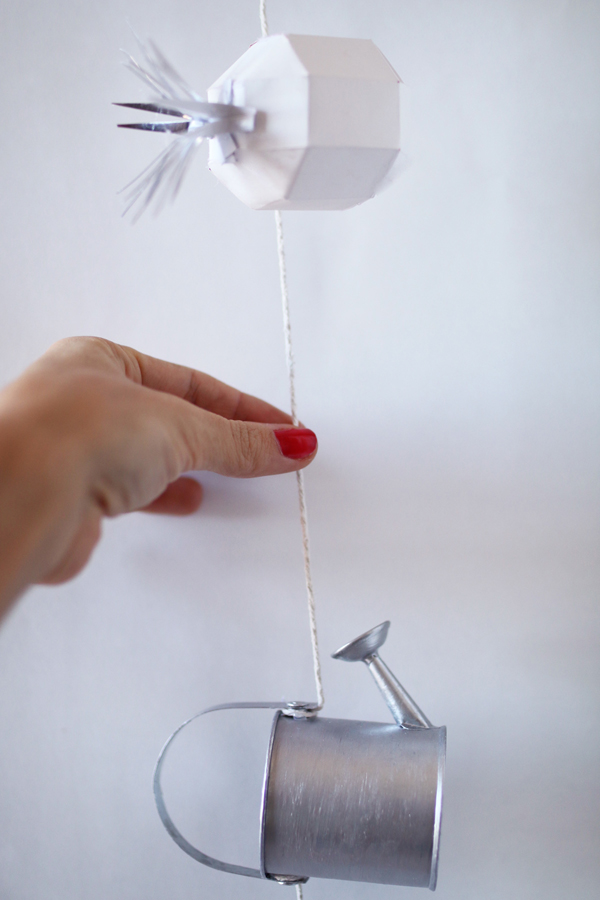
– Little objects you have found (What we used: little wood sticks, plastic animals, Kinder toys, silver Xmas baubles)
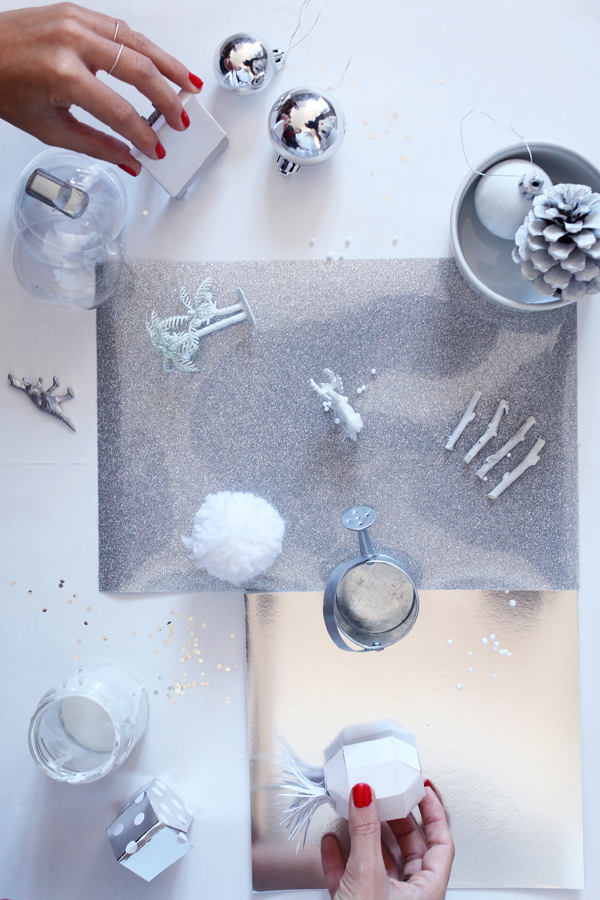
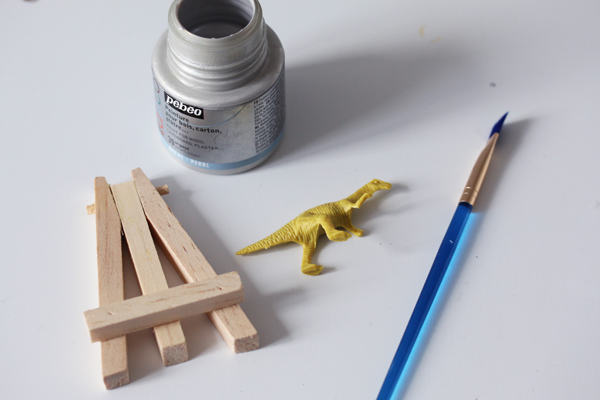
STEP 1: Painting the different elements

For my garland, I was thinking white and silver. First, I painted all the small objects I collected starting with the kitchen twine. To paint your twine, it’s simple, put some paint in a can and dip the twine in it.Then, all you need to do is wait for the twine to dry after you’ve spread it out on a flat surface.
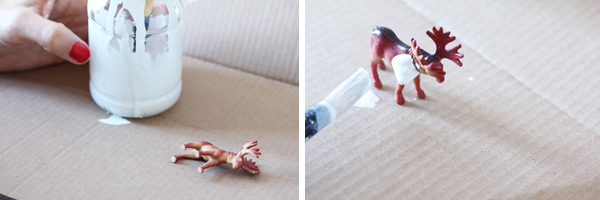
As for all the other items,use the left-over paint in your can and a brush. It’ll take 2 or 3 coats to cover your small objects, 2 for the white, and 3 for the silver.
STEP 2: Create original Xmas baubles
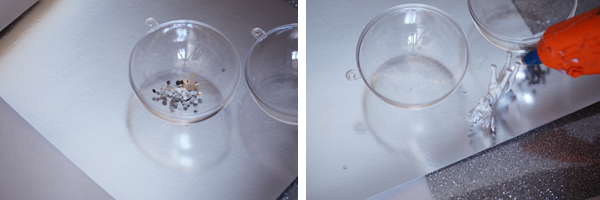
I chose to put my little plastic animals inside the transparent Xmas baubles. I put some silver glitter in one and a few styrofoam balls in the other and then I glued the feet of the elk and the dinosaur to the inside of the bauble.Then I glued both Kinder toy horse and car to each other. I did the same thing with my four little white sticks.
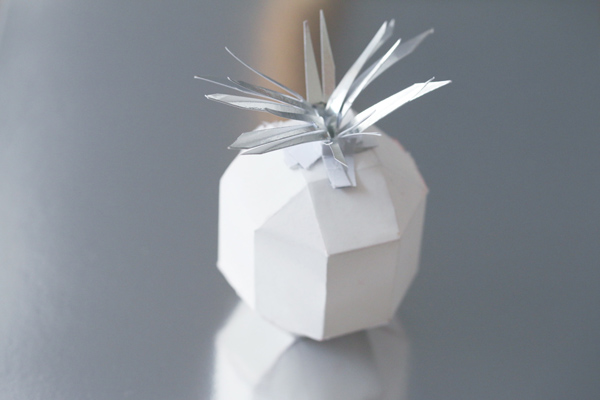
To complement my other objects, I added a medium-sized white pompon made of white wool, a tiny silver cardboard house (you can find templates for these on the Net) on which I pasted a few little white stickers, And finally a paper pineapple that I designed from an octogone (it’s a little long to do but the end-product is really cute, and if the idea appeals to you, I’ll see if I can come up with a short tutorial eventually.)
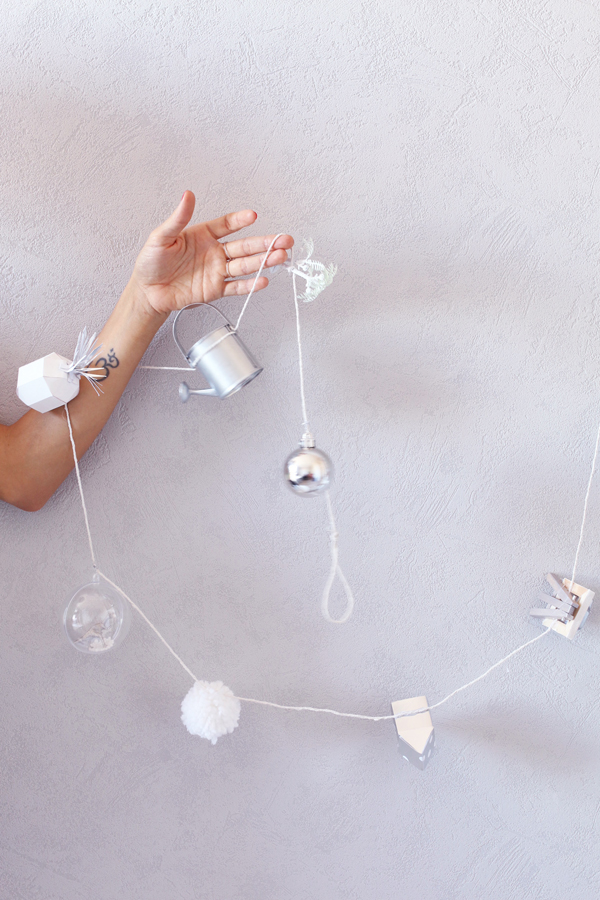
STEP 3: Put your garland together
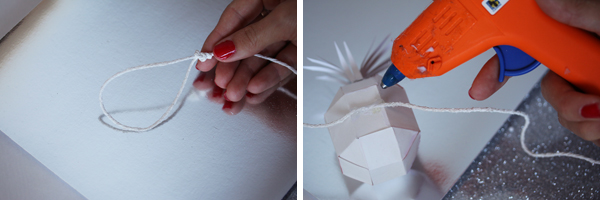
Once all your small objects have been painted and have dried, the time has come to make your garland. Start by making bows at both ends of your garland so you can easily hang it on your tree. (Or anywhere else!) Then glue each of your objects to the twine with your glue gun (if you have one) or with a tube of glue. When possible, add extra glue around each object so it sticks more securely to the twine.
We’d like to see what you’ve created! Tag @babasouk via instagram to show us your work of art. We’ll regram our favorites! Most of all, have fun! -Stephanie
*This DIY project was created by Astrid of the SP4NK blog for Baba Souk, all pictures are by her.